How Do Corten Steel Screens Attach to the Ground?
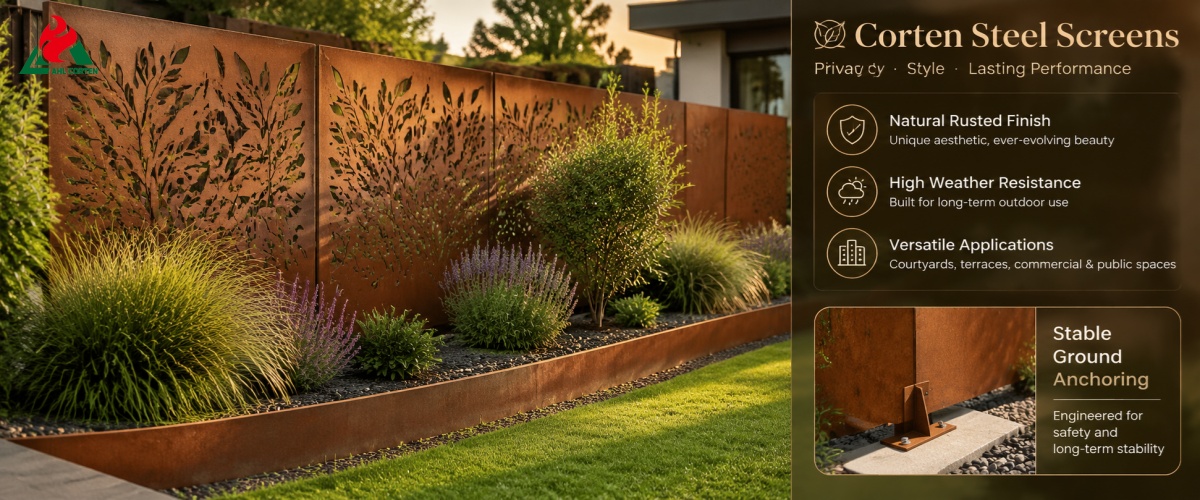
Corten steel screens are a popular decorative material in modern outdoor landscaping. With their unique vintage rusted finish and high weather resistance, they combine aesthetic appeal with practicality. They are currently widely used in various public and private outdoor spaces and are suitable for a diverse range of settings.
Common applications include providing privacy in courtyards, partitioning terrace spaces, decorating residential entrances, and creating landscape backdrops. They are also well-suited for commercial spaces such as hotels and restaurants, as well as public landscape projects like parks and plazas.
Weathering steel screens have large surface areas and extensive wind-exposed surfaces. In particular, continuous screens—whether enclosed, semi-enclosed, or with low perforation rates—are highly susceptible to massive wind loads during strong winds. Their stability cannot rely solely on the panels themselves; they must be supported by a reliable ground-anchoring structure and foundation system.
If the anchoring method is inappropriate, the foundation depth is insufficient, the fasteners are improperly selected, or drainage design is lacking, various problems will arise over time. Minor issues include screen sway, warped lines, water accumulation, rust at the base, and loose fasteners; more serious consequences include panel tilting and overall collapse, posing severe structural safety hazards during extreme weather.
There are no universal standards for the ground anchoring of weathering steel screens; solutions must be customized to suit specific site conditions. During design and construction, comprehensive consideration must be given to the screen’s dimensions, panel weight, perforation rate, local wind speeds, soil conditions, installation surface, and the characteristics of the intended use.
A professional ground anchoring system is key to balancing the aesthetic appeal, privacy, and long-term stability of weathering steel screens; it is also a core prerequisite for extending the product’s service life and ensuring safe use.
6 Main Methods for Ground-Mounting Screens (Pros, Cons, and Suitable Applications)
1. Concrete Embedded Foundation (The Most Stable and Common Solution)
This is the most stable and widely used mounting method for freestanding weathering steel screens, primarily suitable for soil, lawns, and soft landscape surfaces. By deeply embedding the posts and pouring and curing concrete, a solid load-bearing foundation is formed, providing exceptional wind resistance and stability against overturning.
This solution is suitable for tall and wide screens, screens in open, wind-exposed areas, and outdoor landscaping projects requiring long-term installation without the need for dismantling. The standard depth for the foundation pit is 45–60 cm; for screens exposed to high wind pressures or those that are exceptionally wide or tall, the depth should be increased to 60–80 cm. Specific dimensions should be adjusted based on soil conditions, the frost line, and project requirements.
2. Base Plate Anchor Bolt Fixation (For Hardened Surfaces Only)
This method secures the screen to hard surfaces—such as concrete slabs or stone paving—by using expansion bolts, chemical anchors, or mechanical anchors through the screen’s base plate, eliminating the need for extensive excavation.
Its advantages include quick installation, minimal damage to the existing surface, and ease of future removal, maintenance, and adjustment. It is particularly suitable for scenarios with hardened surfaces, such as courtyard renovations, rooftop gardens, and patio paving. However, this method is only suitable for surfaces that are solid and free of hollows or cracks; large, tall screens must not be directly mounted on thin decorative concrete surfaces.
3. Concealed Sleeve Mounting (High-End Aesthetic Solution)
Concealed sleeve mounting is the preferred solution for high-end custom projects. Rusted steel screen panels are embedded into specialized metal sleeves or profile frames and secured via pre-embedded foundations or base plate structures, resulting in no exposed bolts or fasteners.
This method achieves seamless alignment of the screen panels, creating a clean and sophisticated visual appearance while maximizing the preservation of the weathering steel’s natural texture. It is suitable for projects with extremely high aesthetic requirements, such as continuous landscape screens, commercial entrances, and high-end courtyards. The drawback is that it requires high construction precision and allows for limited room for fine-tuning after installation.
4. Ground Pile Anchoring (Exclusively for Lightweight Decorative Screens)
The ground-pile and connecting-plate anchoring solution is simple to install and cost-effective, specifically designed for low-profile, lightweight decorative weathering steel screens. It is commonly used for flower bed enclosures, small courtyard landscaping, and low-profile space partitioning.
This method features a short construction cycle and requires no complex foundation; however, its wind resistance and stability against overturning are limited, making it suitable only for areas with low wind speeds and minimal obstructions. Its use is strictly prohibited for tall, floor-to-ceiling screens installed at heights or in open, wind-exposed areas to avoid safety hazards.
5. Wall-Mounted Auxiliary Fixing (Space-Saving Solution)
Using L-shaped and Z-shaped heavy-duty corner brackets along with weather-resistant fasteners, the screen is secured to load-bearing walls, existing fences, or building columns, significantly reducing the space occupied on the ground.
During installation, a 20–50 mm ventilation gap must be left between the screen and the wall to ensure ventilation and drainage on the back side, preventing localized rust caused by water accumulation and moisture. This solution is suitable for scenarios such as terrace partitions, building exterior landscaping, and courtyard boundary fencing. It may only be secured to solid load-bearing structures; installation on loose or cracked walls is strictly prohibited.
6. Quick Selection Guide for Mounting Methods
For soil or lawn surfaces, prioritize concrete embedding; for hardened concrete surfaces, use base plate anchor bolts; for a minimalist aesthetic, opt for concealed sleeve mounting; for low decorative screens, use ground stakes; and for installations adjacent to building structures, use auxiliary wall mounting.
For screens that are tall and wide, have a large wind-facing surface, or are located in areas with high wind speeds, do not settle for a simplified solution; instead, prioritize detailed foundation design and wind load calculations to ensure structural safety.
.jpg)
Installation Steps for Corten Steel Screens on Soft Surfaces (Soil/Lawn)
1. Preliminary Survey and Site Planning
Before construction begins, accurately verify the corten steel screen’s length and width, as well as the number and spacing of the posts, and conduct a comprehensive survey of the construction site. Pay special attention to underground water, electricity, and utility lines, as well as irrigation systems, to avoid the risk of damage during construction.
At the same time, assess the site’s wind direction, drainage conditions, and soil bearing capacity to plan the screen’s installation location, ensuring it does not obstruct plant growth or daily traffic. Finally, use string lines to mark the center points of each post, ensuring a uniform overall layout.
2. Foundation Pit Excavation and Drainage Treatment
Determine the foundation pit dimensions based on the screen’s height, wind-exposed area, and local wind conditions, following the principle of “tall screens, high-wind areas, deep foundations.” The foundation pits should maintain vertical side walls as much as possible to avoid an inverted conical structure (narrow at the top and wide at the bottom), which would compromise load-bearing stability.
A layer of clean crushed stone approximately 10 cm thick is laid at the bottom of the foundation pit to create a drainage layer. In low-lying areas of the site, additional drainage slopes or blind drains must be installed, and the surrounding ground should be sloped outward to prevent rainwater from pooling at the base of the posts over time. Additional foundation reinforcement may be required in areas with soft soil, backfill, or frost heave.
3. Column Positioning and Vertical Alignment
Place the column in the center of the foundation pit. First, adjust the embedment depth, then use a level to verify verticality in both directions, ensuring there is no tilt forward, backward, left, or right. Standardize the installation height of all columns and use control lines to verify overall straightness and spacing.
After calibration, use timber blocks and clamps to provide temporary support and stabilization to prevent the columns from shifting during concrete pouring. When installing multiple columns, verify their parallelism and alignment simultaneously.
4. Concrete Pouring and Curing
Pour the concrete in layers, gently vibrating it to remove air bubbles and ensure the concrete completely encases the columns, eliminating any voids or gaps. The top surface of the concrete should be slightly below the surrounding ground level and sloped outward to facilitate drainage, preventing water accumulation at the base.
Under normal conditions, the concrete must cure for 24–48 hours before panel installation can proceed; curing time must be extended under low-temperature, rainy, or windy conditions. It is strictly prohibited to install panels or remove temporary supports before the concrete has fully cured.
5. Screen Panel Installation and Detail Work
Panel installation should be performed by two people working together to avoid bumping or deforming the panels. First, verify the completeness of the panels, connectors, and brackets. Begin aligning and securing the panels from the bottom, gradually working upward to tighten them.
Leave a 3–5 mm expansion gap between adjacent panels to accommodate the thermal expansion and contraction of the steel and prevent deformation caused by compression. Use stainless steel fasteners compatible with weathering steel, or fasteners made of the same material, to avoid electrochemical corrosion caused by dissimilar metal contact.
6. Final Inspection
After installation is complete, inspect each column for verticality, each panel for levelness, ensure uniformity of expansion gaps, and verify that all bolts are securely tightened. Gently push the screen to test for abnormal sway, and check that there is no standing water at the base and that drainage channels are unobstructed.
For projects in high-wind areas, coastal regions, permafrost zones, and public spaces, it is recommended that professionals conduct structural and wind load reviews to ensure long-term safety.
.jpg)
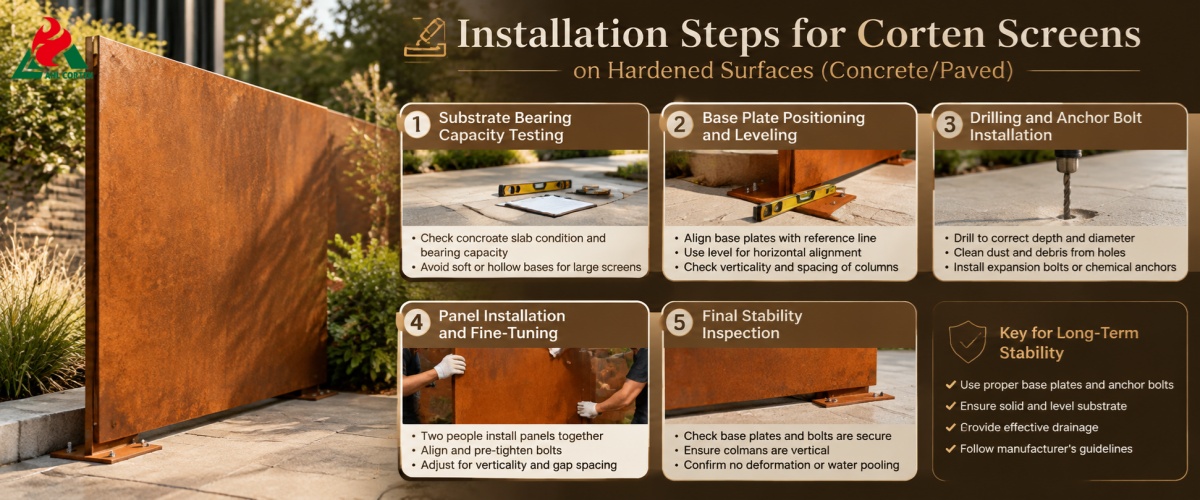
Installation Steps for Corten Screens on Hardened Surfaces (Concrete/Paved)
1. Substrate Bearing Capacity Testing
Before installation, thoroughly inspect the condition of the hardened surface to confirm that the concrete slab meets the required thickness, has sufficient bearing capacity, and is free of hollows, cracks, or settlement issues. At the same time, mark the drilling locations to avoid internal rebar and utility lines, preventing damage during construction.
On hardened surfaces with thin decorative layers or soft subbases, do not directly mount large-scale screens; reinforce the subbase or modify the embedded foundation design as needed.
2. Base Plate Positioning and Leveling
Position the base plates according to the construction drawings, align them with the installation reference line, and use a level to verify the base plates’ horizontal alignment. Minor ground level differences can be adjusted using metal shims; however, do not rely on a large number of shims to compensate for severe unevenness in the subbase.
Position the columns and check their verticality in both directions. Verify the spacing and overall straightness of multiple columns, and precisely mark the drilling locations for the anchor bolts.
3. Drilling and Anchor Bolt Installation
Select a drill bit that matches the anchor bolt specifications, precisely control the drilling depth and hole diameter, and thoroughly clean dust and debris from the holes after drilling. Install fasteners such as expansion bolts and chemical anchors in sequence, then align and install the base plates, washers, and nuts.
Tighten the nuts evenly in stages to avoid applying excessive force, which could cause the threads to strip or the concrete to crack. In high-wind areas or for tall screens, strictly follow the manufacturer’s installation standards and use anchor bolts and base plates of the corresponding specifications.
4. Panel Installation and Fine-Tuning
After confirming that the posts and base plates are fully and securely fastened, two people should work together to install the screen panels. Align the panels with the pre-drilled holes and brackets, then manually pre-tighten all bolts to adjust the panels’ verticality, horizontality, and gap spacing.
Once fine-tuning is complete, gradually tighten all fasteners, ensuring throughout the process that the bottom of the panels do not rest directly on the ground to allow for ventilation and drainage.
5. Final Stability Inspection
Verify that the base plate is fully flush with the foundation surface, all anchor bolts are securely fastened, the columns are not tilted, and the panels show no deformation or wobbling. Inspect the foundation surface for any new cracks or spalling, and ensure there is no risk of water accumulation at the base.
For screens in extra-tall, extra-wide, or open areas, structural stability can be further enhanced by enlarging the base plate, upgrading the anchor bolts, or adding auxiliary supports.
Off-Ground Installation: A Critical Detail for the Durability of Weathering Steel Screens
1. Hazards of Ground-Level Installation
Prolonged contact between the bottom of weathering steel screens and the soil, standing water, fallen leaves, and debris creates a persistently damp environment. This not only leads to localized rusting, pitting, and rust stains at the base of the panels but also results in uneven rust patina formation, compromising the overall aesthetic quality of the landscape.
At the same time, standing water accumulation at the base accelerates corrosion of the brackets and posts, significantly shortening the screen’s overall service life and creating potential structural instability.
2. The Core Benefits of a Clearance from the Ground
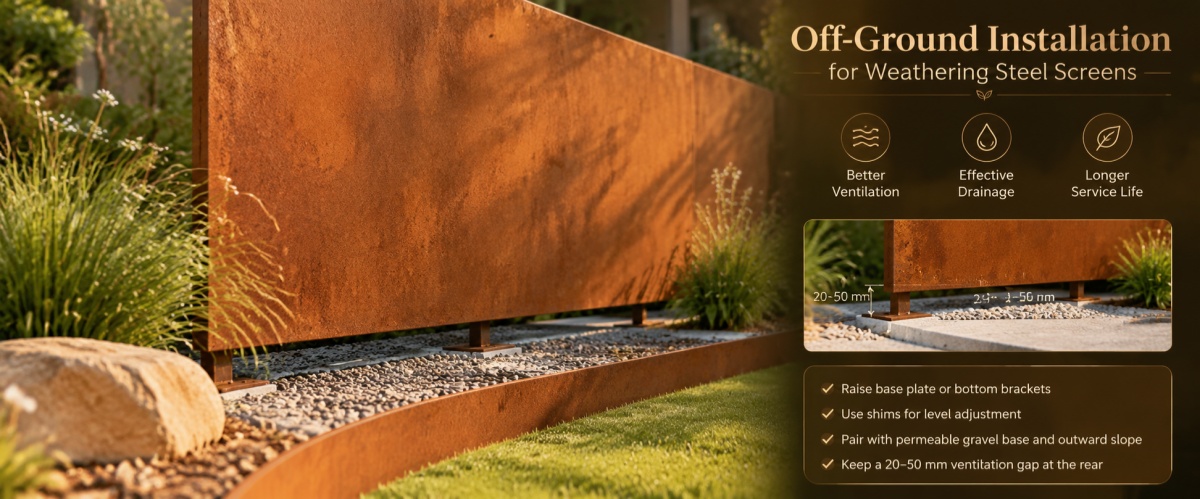
Standard construction practices recommend leaving a 50–100 mm clearance between the bottom of the screen and the ground, which is suitable for the vast majority of outdoor settings. A reasonable clearance accelerates air circulation, allows the panel surface to dry quickly, and prevents the accumulation of standing water and debris.
This design not only allows the rust layer on weathering steel to form evenly—enhancing the aesthetic appeal of the landscape—but also reduces the likelihood of localized corrosion. It also facilitates future cleaning, inspection, and maintenance, giving the screen a lighter and neater appearance.
3. Standard Off-Ground Installation Procedures
Off-ground installation can be achieved by raising the base plate, elevating the bottom brackets, or using shims. On soft ground, pair the structure with a permeable gravel base and an outward-sloping drainage gradient; when installing the wall, maintain a 20–50 mm ventilation gap at the rear.
Off-ground installation does not require excessive overhangs; the key is to completely cut off moisture sources at the base while balancing drainage, ventilation, and aesthetic appeal.
Key Points on Wind Loads and Structural Safety
The safety and stability of corten privacy fence does not depend on the thickness of the panels, but rather on the entire support system. The screen’s height, width, perforation rate, column spacing, foundation type, and site wind conditions collectively determine its overall wind resistance.
1. High-Risk Installation Scenarios
Tall, narrow freestanding screens, large-area continuous screens, and solid screens with low perforation rates are subject to extremely high wind loads. Roofs, coastal areas, open spaces, wind corridors of high-rise buildings, and public areas with heavy foot traffic are considered high-risk installation scenarios and require special attention to structural reinforcement.
2. Requirements for a Professional Wind Load Assessment
For large-scale, commercial, public, and high-wind-speed area projects, professional structural and wind load calculations must be completed prior to construction. Key indicators—such as design wind speed, screen parameters, foundation dimensions, anchor bolt bearing capacity, and foundation surface strength—must be thoroughly verified, and additional posts, tie rods, and reinforcement structures must be installed as needed.
Avoid blind installation based solely on panel thickness or construction experience, and eliminate safety issues such as overturning, deformation, and detachment at their source.
.jpg)
Common Installation Mistakes and Pitfall Avoidance Guide for Corten Steel Screens
- Prioritizing Panels Over Supports: Fixing only the panels while neglecting columns and foundations leads to concentrated stress, causing the screen to sway and topple—the most common safety hazard.
- Installation on Weak Subgrades: Installing large, tall screens directly onto soft soil with shallow foundations, concrete with voids or cracks, or thin paving layers makes them highly prone to settlement, loosening, and collapse.
- Neglecting Expansion and Corrosion Protection: Failing to provide temperature expansion joints or mixing dissimilar metal fasteners can cause panel deformation due to compression, electrochemical corrosion, and rust staining.
- Rushing the Schedule and Violating Construction Standards: Installing panels before concrete has fully cured causes foundation displacement and cracking, permanently compromising structural stability.
- Lack of drainage design: Panels installed flush with the ground, without a drainage slope or permeable layer, allow long-term water accumulation that accelerates corrosion at the base and shortens the product’s service life.
Frequently Asked Questions (FAQ) About Corten Steel Screens
1. Can Weathering Steel Screens Be Installed By Simply Inserting Them Into The Ground?
Low-profile, lightweight decorative screens may be secured using ground stakes inserted directly into the soil. Tall, large-scale, floor-standing, or continuous screens must never be shallowly inserted into the soil; they must be installed with a concrete foundation buried 60–80 cm deep to withstand wind loads and foundation settlement.
2. Do Corten Steel Screens Require a Concrete Foundation?
It is not an absolute requirement. Tall, large-scale, floor-standing screens—especially those in wind-exposed areas—must have a concrete foundation; low, decorative screens, wall-mounted screens, and screens installed on solid, hardened surfaces may use anchor bolts or base plates for fixation, without the need for a pre-embedded foundation.
3. Can Screens Be Installed On Wooden Floors Or Paved Surfaces?
They can be installed on hard-paved surfaces, with the anchor bolt and base plate method recommended. For wooden floors, the load-bearing capacity of the joists and supporting structure must be verified in advance. Direct attachment to the decorative surface layer is prohibited; if necessary, reinforce the subfloor or install a separate foundation.
4. What Is the Optimal Height From the Floor?
The standard height from the floor is 50–100 mm. For wall-mounted screens, leave a 20–50 mm ventilation gap at the back. Specific measurements can be adjusted based on the site’s drainage conditions and the screen’s dimensions.
5. Does Installing a Screen Require Professional Installation?
Small, lightweight DIY screens can be installed by yourself. However, large-scale, floor-to-ceiling, wind-exposed, or commercial/public-space screens must be installed by a professional team to ensure safety and durability through foundation calculations, wind load assessments, and standardized installation.
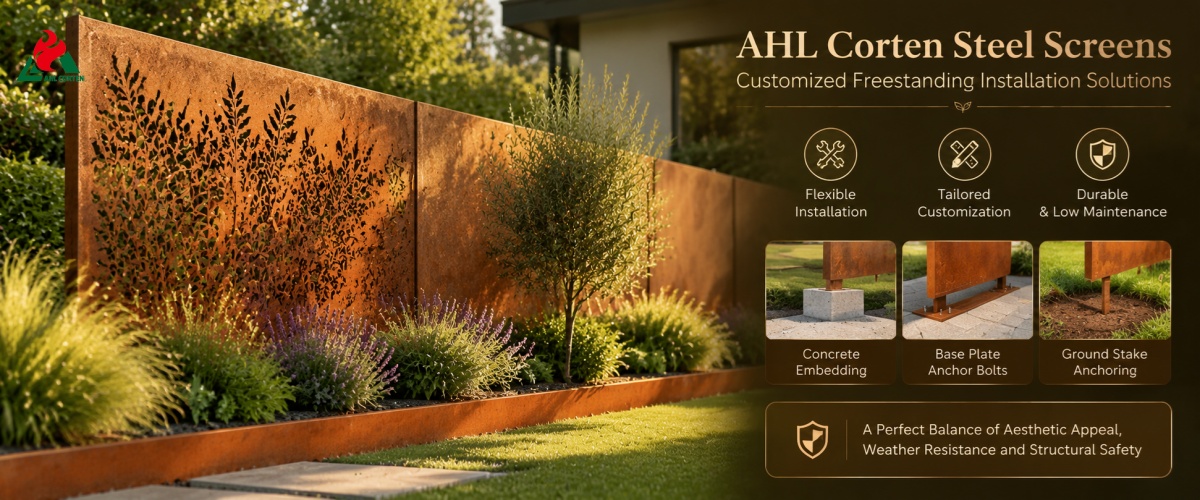
AHL Corten Steel Screens: Customized Freestanding Installation Solutions
AHL rusted screens are suitable for all types of outdoor landscaping projects, balancing aesthetic design, weather resistance, and structural safety. Custom installation solutions can be tailored to the project site, dimensions, wind conditions, and ground conditions.
1. Versatility for All Installation Scenarios
Supports all installation methods, including concrete embedding, base plate anchor bolts, concealed sleeves, wall mounting, and ground stake anchoring. Suitable for various surfaces such as soil, lawns, concrete, paved areas, and wooden substrates, meeting the diverse needs of residential, commercial, and public landscape projects.
2. Comprehensive Customization Services
We offer customization options for metal gate privacy screen manufacturing perforation patterns, dimensions, thickness, support structures, foundation solutions, and drainage systems. Our solutions adapt to a wide range of landscape styles—including minimalist luxury, natural rustic charm, and modern minimalism—to harmonize aesthetic appeal with practicality.
3. Long-Term Quality Assurance
AHL comprehensively optimizes every aspect—from foundational design and hardware selection to drainage layout and corrosion protection—avoiding the pitfalls of solutions that focus solely on the aesthetic appeal of individual panels while neglecting structural integrity. The entire system balances the weathered, rustic texture of Corten steel with wind resistance and long-term durability, significantly reducing future maintenance costs.
Are You Ready To Choose An Outdoor Corten Steel Screen That’s Right For You?
There is no one-size-fits-all solution for ground mounting corten screens and shade panels; the key lies in tailoring the approach to the specific site and requirements. Soft soil requires concrete foundations with embedded anchors, while hardened surfaces are best secured with anchor bolts and base plates. For aesthetic settings, concealed installation is preferred, and lightweight decorative screens can be secured with simple ground stakes.
Proper ground clearance, a comprehensive drainage system, an appropriate mounting structure, and compliant construction methods are the four key factors ensuring the long-term stability, aesthetic appeal, and durability of the screens. Only when paired with a professional ground-mounting solution can high-quality weathering steel screens fully realize their value in providing privacy and enhancing the landscape, while remaining suitable for complex outdoor climatic conditions over the long term.
Get a Quote
Back

 Fill In The Inquiry