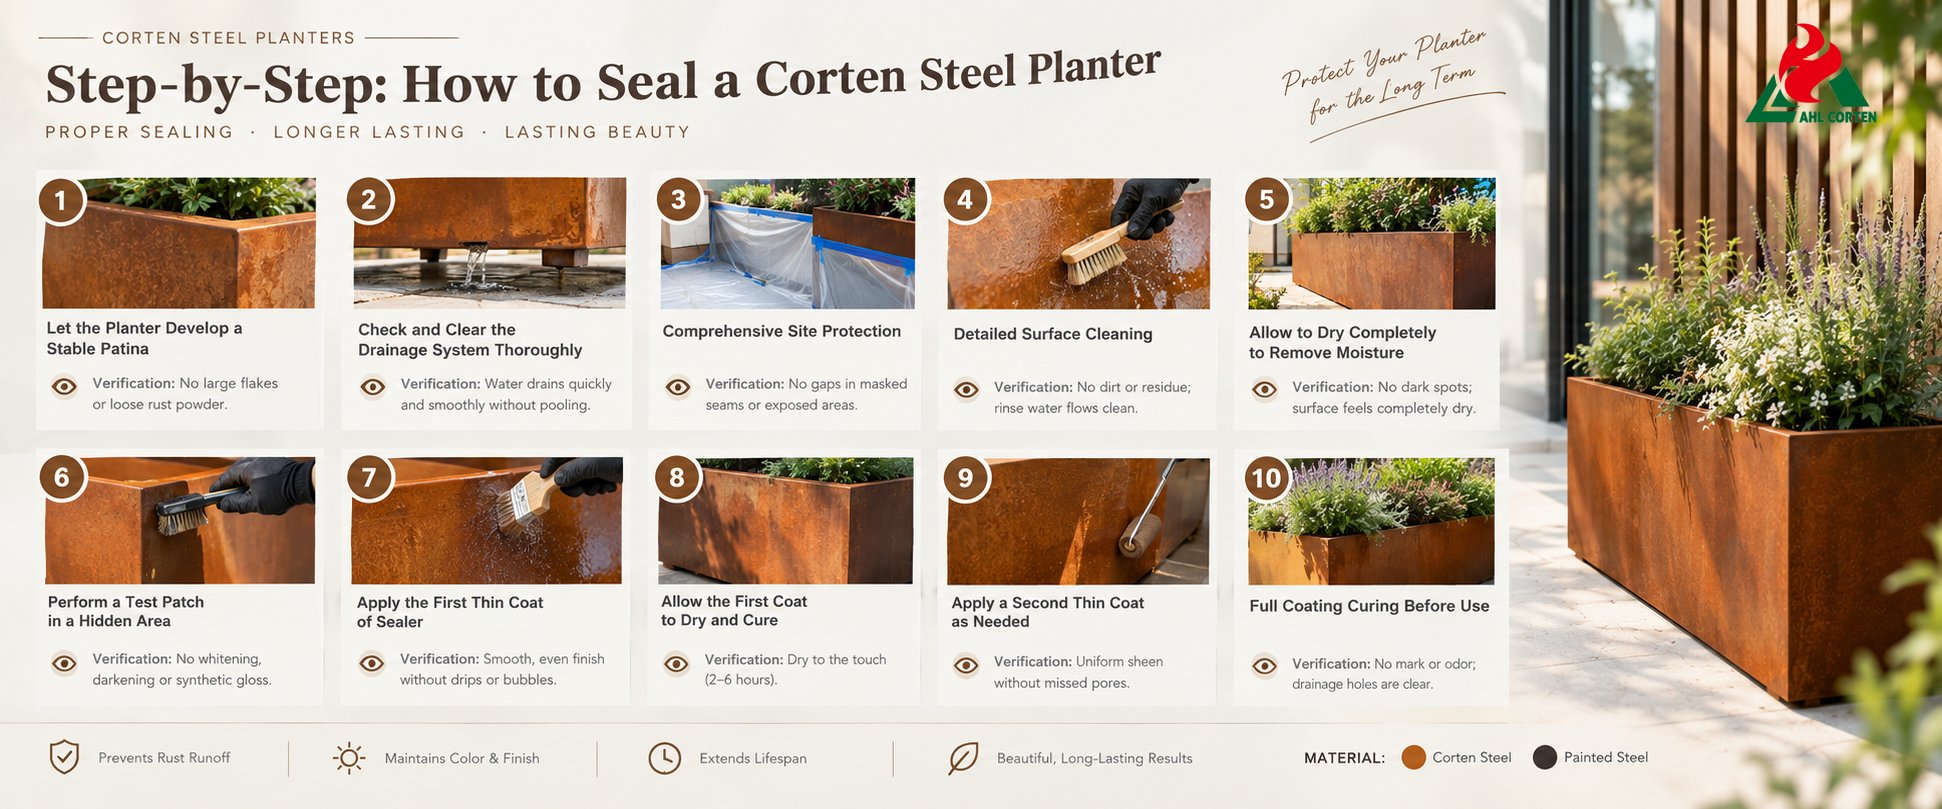
1
Let the Planter Develop a Stable Patina
Verification Method: Wipe the surface with a dry hand; no large flakes or loose rust powder coming off indicates readiness.
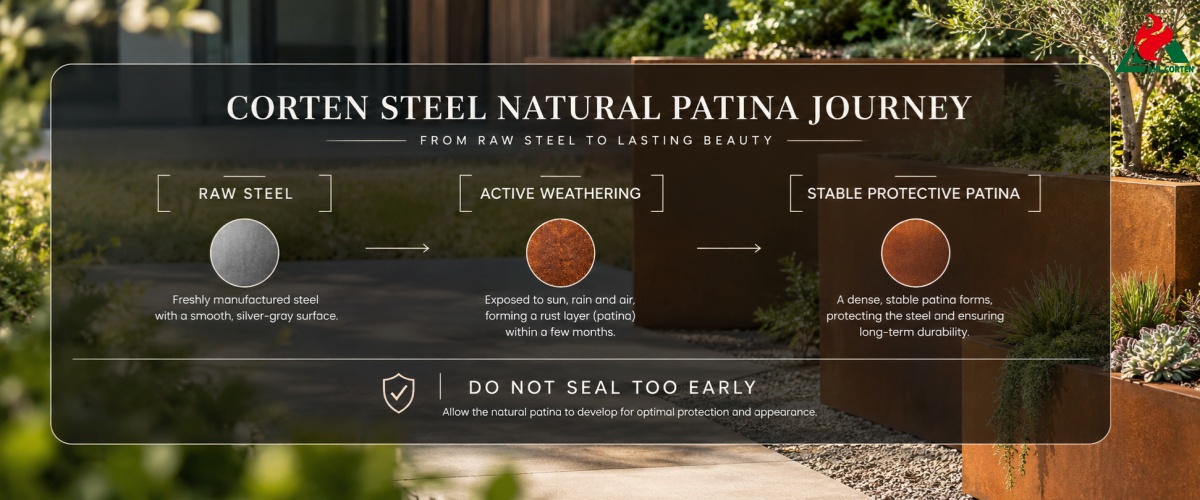
Allow the newly unboxed planter to sit outdoors for 3 to 6 months, undergoing multiple natural wet-dry cycles. Wait until the surface rust layer becomes tight, free of loose powder, and uniform in color before starting sealer application. Never apply a sealer over raw steel, fresh rust, or damp surfaces.
2
Check and Clear the Drainage System Thoroughly
Verification Method: Pour a small amount of water to confirm it drains quickly and smoothly without pooling.
Clear each bottom drainage hole individually, removing dirt, fallen leaves, and other blockages. Install elevated foot pads or risers to elevate the planter base for bottom-up ventilation. This prevents trapped standing water and addresses internal rusting at its root.
3
Comprehensive Site Protection
Verification Method: Inspect all masked seams to ensure no gaps are exposed.
Cover surrounding paving, plants, and decorative hardscaping with drop cloths and protective film prior to application. Use painter’s tape to seal off drainage holes, hardware accessories, and decorative seams that do not require coating to prevent sealer contamination.
4
Detailed Surface Cleaning
Verification Method: Wipe with a damp cloth to confirm no residual dirt; rinse water flows clean without foam.
Scrub the exterior walls with a nylon bristle brush and clean water to remove loose rust, dust, bird droppings, and debris. For stubborn stains, use a mild, plant-safe cleaner and rinse thoroughly with clean water to remove all suds. Never use wire brushes, close-range power washers, or harsh acidic/alkaline chemicals, which can scratch or damage the mature protective rust layer.
5
Allow to Dry Completely to Remove Moisture
Verification Method: Visually verify no dark wet spots; the surface feels completely dry without dampness.
Move the commercial grade planter to a well-ventilated, dust-free, and rain-sheltered outdoor area to air-dry naturally for 24 to 48 hours. The porous rust layer traps microscopic moisture; applying a sealer over damp steel will cause blistering and peeling later.
6
Perform a Test Patch in a Hidden Area
Verification Method: Once the test patch is fully cured, visually verify no unnatural white haze, darkening, or synthetic gloss.
Apply a small sealer test patch to an inconspicuous bottom corner or rear edge of the planter. Once fully cured, observe the surface color and sheen to ensure there is no whitening, darkening, or plastic appearance before proceeding with full application.
7
Apply the First Thin Coat of Sealer
Verification Method: Visually confirm that the coat is smooth and even without drips, runs, or trapped air bubbles.
Stir the sealer thoroughly (do not shake vigorously to avoid introducing air bubbles). Apply the first thin layer using a top-to-bottom, continuous, single-direction stroke via brush or sprayer. Coat exterior surfaces only; never seal the interior soil chamber or drainage holes. Always adhere to the "multiple thin coats" rule—a single heavy coat can cause uneven curing, sagging, and bubbling, significantly lowering protection.
8
Allow the First Coat to Dry and Cure
Verification Method: Lightly touch the surface with a fingertip; it should feel dry without stickiness.
Allow the initial coat to sit undisturbed for 2 to 6 hours, according to product instructions, until it is dry to the touch. Protect the surface from rain, dust, and physical contact during curing. Extend drying time in high-humidity or cold environments.
9
Apply a Second Thin Coat as Needed
Verification Method: The overall coating sheen is uniform without missing microscopic pores.
For high-end paving, commercial outdoors, or high-sunlight areas, a second thin coat is essential. Dual thin coats fill microscopic voids missed in the first layer, substantially enhancing UV resistance, rust runoff protection, and weatherability compared to a single thick coat.
10
Full Coating Curing Before Use
Verification Method: Press lightly on the surface leaving no mark or chemical odor; drainage holes are completely clear.
Allow the complete coating system to cure for 24 to 48 hours after application. Once fully dry and non-tacky, remove protective masking materials, clear drainage ports, proceed with soil filling, planting, and active service.


.jpg)
 Fill In The Inquiry