How to Install Corten Steel Edging on Slopes and Steps
Corten steel edging delivers clean, timeless architectural lines to modern landscapes, but installing it along sloped terrain or outdoor step transitions presents unique structural challenges. Without an anchoring and layout strategy engineered for the grade, even heavy-gauge steel borders inevitably suffer from downhill creep, panel leaning, soil washout, and jagged step transitions after a single rainy season.
Achieving razor-sharp, permanent stability doesn't come down to steel thickness alone—it hinges on precision layout planning, deep-ground anchoring, adaptive slope excavation, and effective drainage control.
Whether you are navigating gentle garden contours or stepping down a terraced entryway, this guide breaks down the essential field techniques to lock your rusted metal garden edging permanently in place.

Quick Answer: What Changes on Slopes and Steps?
| Site Conditions |
Installation Approach |
Main Priority |
| Gentle, continuous slope |
Follow the ground profile with compatible sections |
Consistent exposed height and secure anchoring |
| Abrupt changes in gradient |
Use shorter sections or fabricated transitions |
Supported joints without forcing panels |
| Terraced planting border |
Use a retaining system designed for the retained height |
Soil pressure, foundations and drainage |
| Edging beside existing steps |
Follow the stair profile with secure corner connections |
Clear walking surfaces and protected edges |
| Steel used as a step riser |
Specify a structural step assembly |
Load resistance, anchoring and local compliance |
Choose a supported sloped corten garden edging system, prepare a firm installation line, connect the sections securely and anchor them according to the manufacturer’s instructions. Add support where the slope changes, at joints and around corners.
Backfill gradually to provide a drainage route rather than trapping runoff behind the steel. Manufacturer guidance identifies supplementary support as useful on slopes or loose ground.
.jpg)
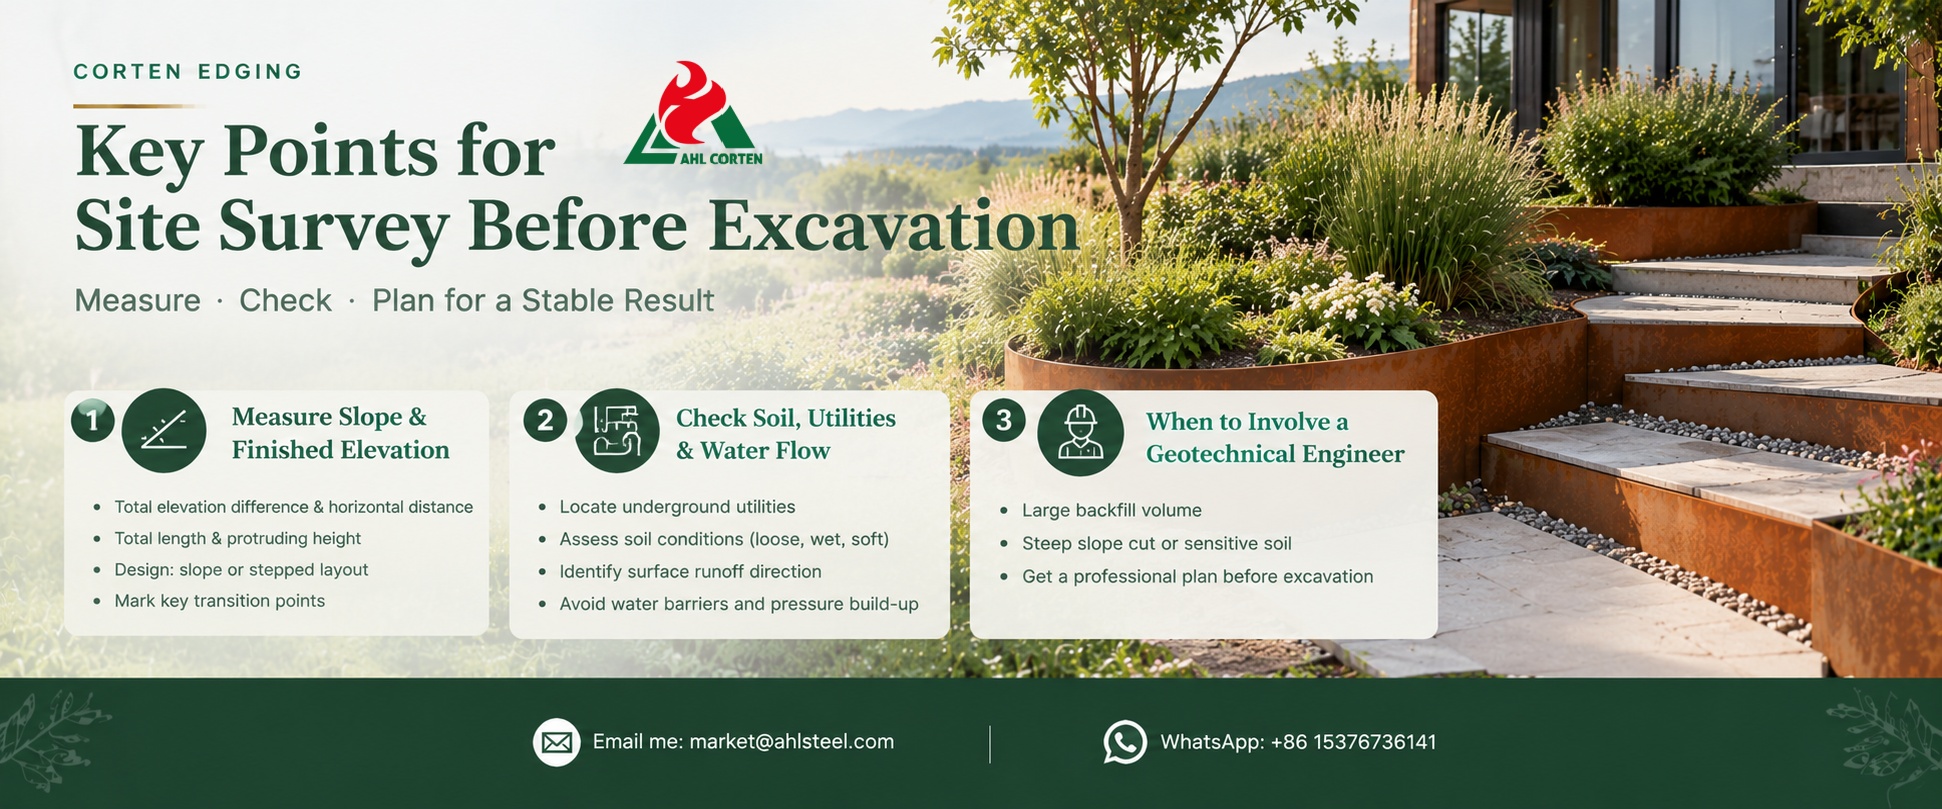
Corten Steel Edging: Key Points for Site Survey Before Excavation
Before construction begins, complete a site survey and data measurements to avoid discovering potential hazards only after excavation has started.
1. Measure Slope and Finished Elevation
First, collect a complete set of baseline data along the planned route: total elevation difference, horizontal distance, total length of the rusted landscape edging, and the height at which the steel plates will protrude above ground after completion.
Determine the design configuration in advance: whether the upper edge of the steel plates will slope continuously with the terrain or form neat, stepped terraces.
Mark all transition points: junctions between the edging and paving, steps, and retaining walls, as well as 90-degree turns.
2. Inspect Soil Conditions, Underground Utilities, and Water Flow Directions
Before excavation, be sure to confirm the locations of underground utilities; piling and excavation must not damage these utilities.
Assess soil conditions: Loose backfill, uncompacted soil layers, and wet, soft subgrades are all prone to causing pile slippage and perimeter edge displacement after being saturated by rainwater.
Identify the direction of surface runoff to ensure that the steel retaining wall does not inadvertently act as a water barrier. Standing water will continuously exert pressure on the soil, compromising the stability of the slope and the retaining structure.
3. Project Tip: When to Involve a Geotechnical Engineer
If there is a large volume of backfill behind the retaining wall, or if the slope cut is steep or the soil is sensitive, it is recommended to consult a civil or geotechnical engineer prior to excavation to develop a professional plan.
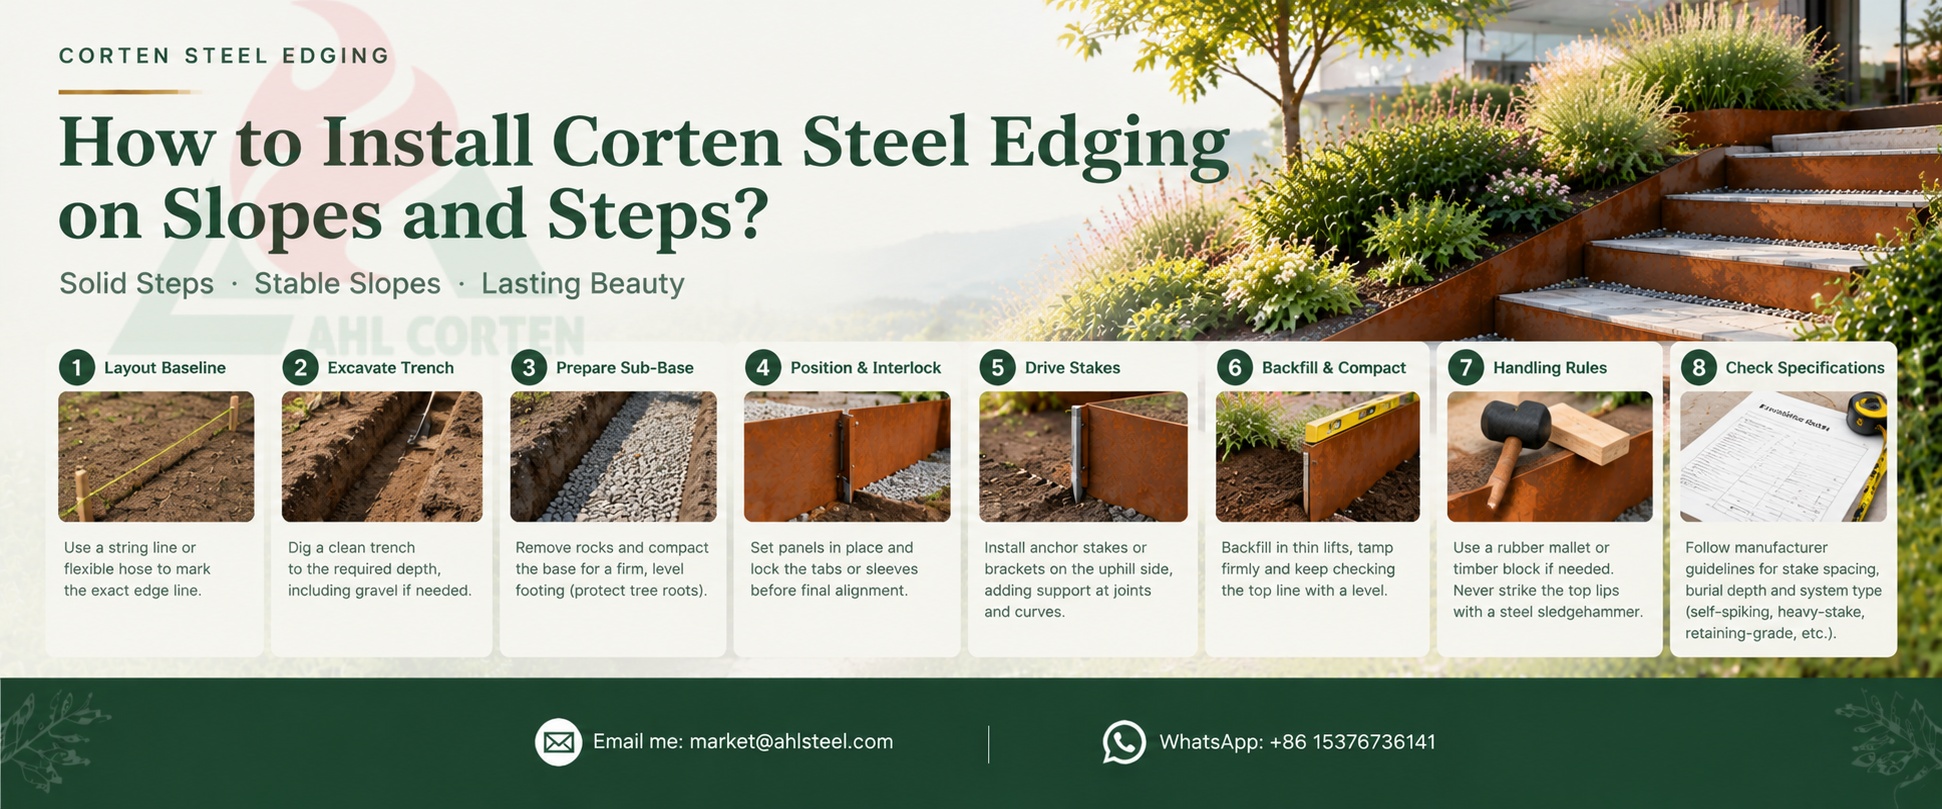
How to Install Corten Steel Edging on Slopes and Steps?
1. Establish a Layout Baseline
Set a high-tension string line (for straight runs) or lay a heavy flexible hose (for smooth curves) along the finished edge line.
2. Excavate Installation Trench
Dig a clean trench along the baseline to the specified system burial depth, accounting for sub-base gravel if required.
3. Prepare Sub-Base
Clear rock obstructions and compact trench bedding to create a firm, level footing without severing critical tree roots.
4. Position & Interlock Sections
Set adjacent Corten panels in the trench, locking the connection tabs or joining sleeves together before adjusting the final vertical alignment.
5. Drive Anchoring Stakes
Install heavy-duty anchor stakes or mounting brackets into the uphill slope, placing extra support at seam joints and directional curves.
6. Backfill & Compact
Backfill both sides of the panel progressively in thin lifts, tamping the soil firmly while continuously checking top-line alignment with a level.
7. Handling Rules
Use a rubber mallet or protective timber block if light tapping is permitted during leveling. Never strike raw Corten top lips directly with a steel sledgehammer.
8. System Specification Check
Follow the exact manufacturer's guidelines for stake spacing and burial depth. Self-spiking strips, separate heavy-stake systems, and retaining-grade profiles require distinct anchoring depths and spacing intervals.
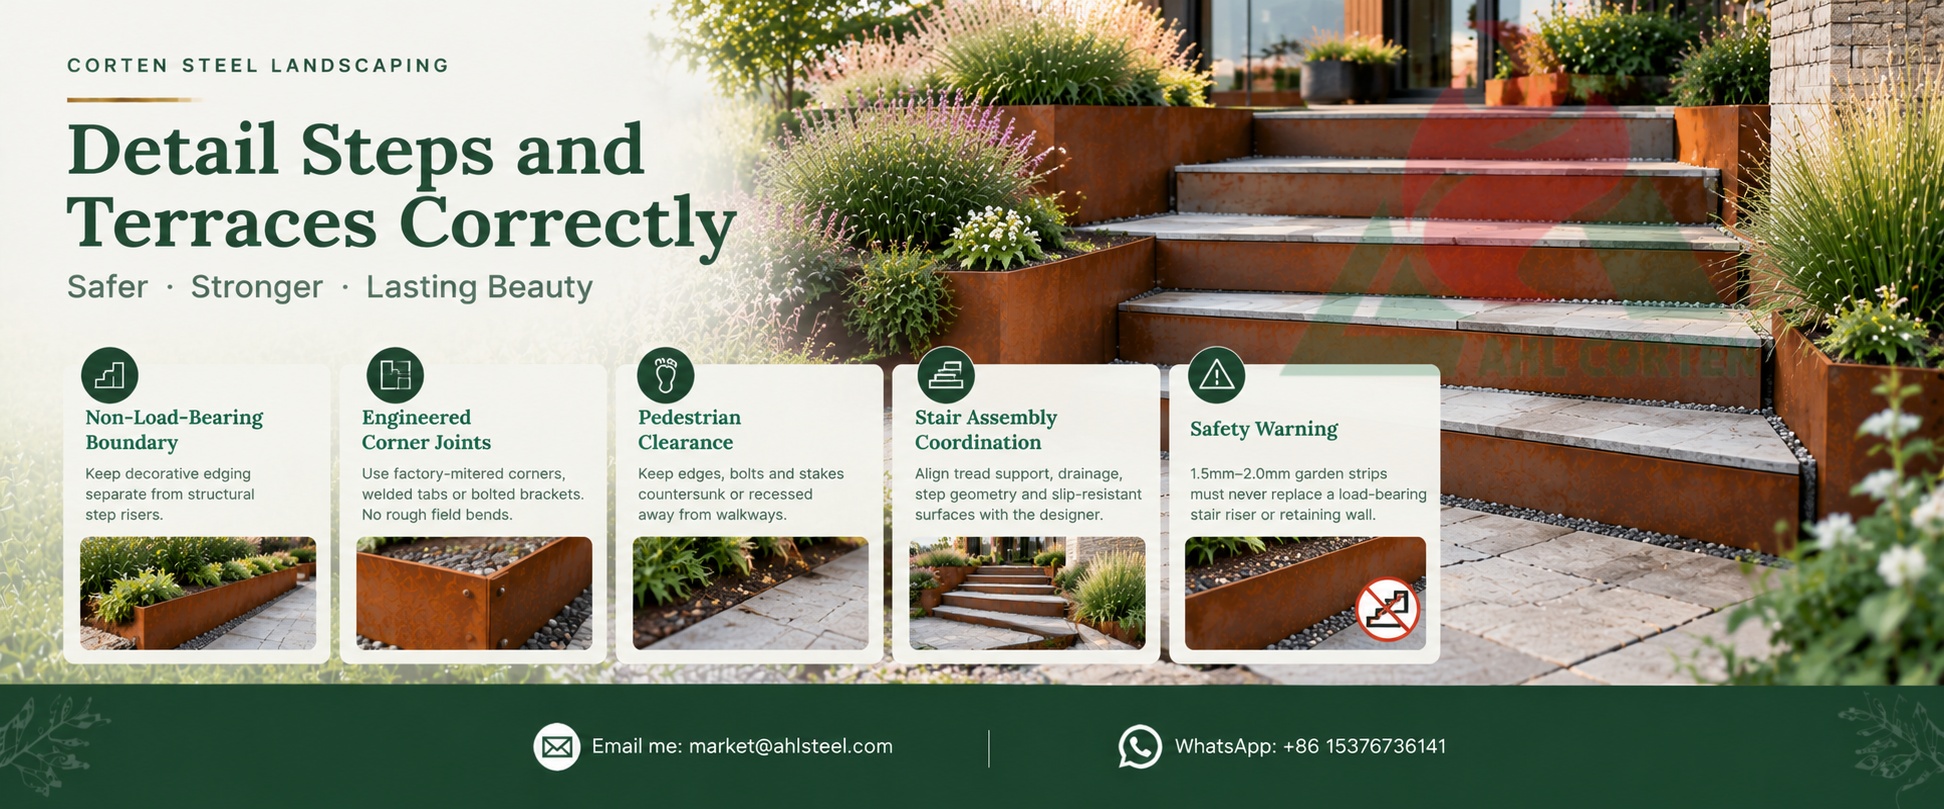
Detail Steps and Terraces Correctly
Prevent Movement, Erosion and Waterlogging
| Potential Problem |
Design or Installation Response |
| Edging moves downhill |
Check anchor suitability, embedment and connection strength |
| Panels bow outward |
Review retained soil height, support spacing and reinforcement |
| Soil washes out |
Manage upstream runoff and stabilise exposed ground |
| Water collects behind steel |
Provide a designed outlet or drainage system |
| Adjacent paving becomes stained |
Route rust-bearing runoff away from vulnerable surfaces |
| Joints settle unevenly |
Improve local support and inspect after heavy rain |
For retaining applications, drainage must be considered along with soil pressure and support—not added as an afterthought. Installation guidelines recommend gradual backfilling and checking alignment before the final surface finish.
FAQ
1. Can Corten Steel Edging Follow a Slope?
Yes, suitable custom corten steel edging systems can follow gentle slopes, while steeper sites may need stepped sections or a terraced layout. The right approach depends on the profile, connections and retained soil height. Not every edging system can accommodate the same changes in gradient, so confirm the layout before ordering.
2. How Should Stake Spacing Change On Sloping Ground?
Anchoring generally needs closer attention at joints, curves, changes in level and areas subject to soil pressure. Use the manufacturer’s specified stake spacing as the starting point rather than applying one universal distance.
Where edging retains substantial soil, longer stakes alone may not be enough—posts, braces or a purpose-designed retaining system may be required.
3. Can Garden Edging Be Used as a Step Riser?
Some steel landscaping systems can form step risers, but ordinary lawn edging should not automatically be treated as a structural step component. Specify the finished riser height, tread depth, compacted fill, connections and supporting structure all together. Choose a system intended for the application and confirm any applicable local requirements before installation.
4. How Do I Stop Soil Washing Out Behind the Edging?
Address the water flow as well as the edging. Plan drainage behind retained soil to provide a suitable discharge route. Where appropriate, use drainage aggregate and a permeable geotextile separator to help keep fine soil out of the drainage layer.
On slopes with concentrated runoff, an uphill swale or diversion may also be needed; edging alone is not a complete erosion-control solution.
Request a Slope-Specific Edging Layout
Need a slope-specific edging layout? Send AHL your site photos, rise and run measurements, retained soil height and project drawings. Request a quotation covering the profile, connections, anchoring and drainage details—not just the steel strips.
Want to Create a Unique Corten Lawn Edging? Contact Us!
Back


 Fill In The Inquiry