How to Install a Metal Water Fountain: Step-by-Step Guide
Date:2025.09.12
Share to:
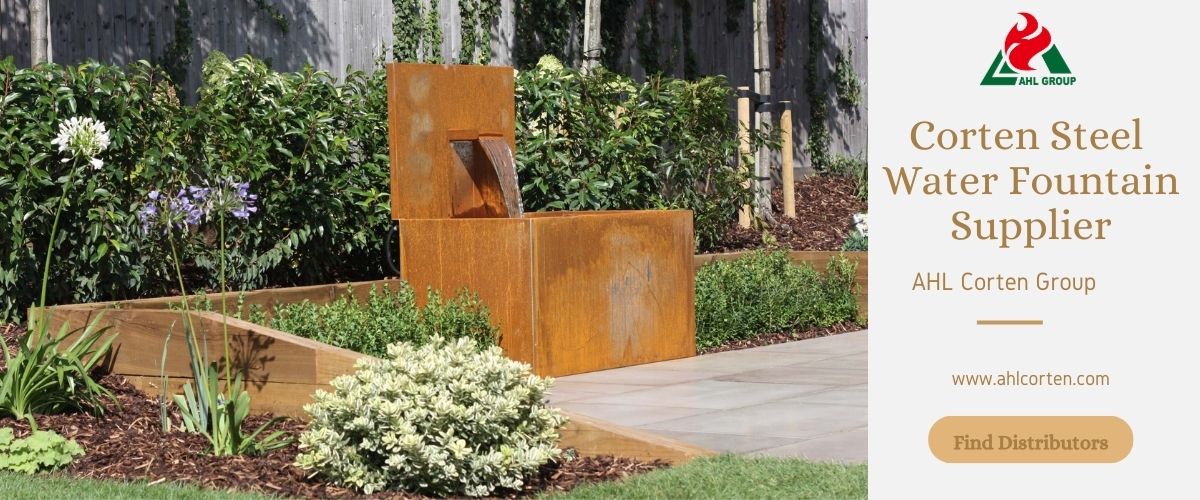
Why Choose a Corten Water Feature?
In outdoor spaces, a metal water fountain instantly elevates the ambiance—the soothing sound of flowing water brings tranquility, while the texture of metal seamlessly blends with greenery and stone. It also attracts birds and butterflies, infusing gardens with a sense of vitality. Among the metal fountains, the Corten water feature stands out: over time, it develops a distinctive rust-colored protective layer (patina). Not only does this layer withstand weathering, but it also transitions from an initial orange-brown hue to a deep, rich brown, transforming the water feature into a “living decoration.”
Whether complementing a courtyard lounge area or serving as a garden focal point, Corten steel water fountains strike a balance between functionality and design. Options like planter water features or fire-water combinations cater to diverse aesthetic preferences.
Pre-Installation: Plan Thoroughly, Prepare Tools and Materials
Preparatory work before installing a metal waterfall fountaindirectly impacts the final effect and stability, requiring meticulous attention to detail.
Plan Core Details First
Choose the right location: Prioritize areas with unobstructed views, such as beside a patio, in the center of a garden, or near seating areas for easy appreciation. Ensure nearby access to power (if using an electric pump) or opt for solar-powered pumps (ideal for well-lit areas and more energy-efficient) to avoid complicated wiring later.
Check Underground Utilities: If excavation is required to anchor the fountain, contact local municipal authorities beforehand to locate and mark underground utilities like electrical lines, water pipes, and gas lines to prevent damage during construction.
Gather Essential Tools
Installing a corten water feature doesn't require complex equipment—common household tools suffice:
Working tools: Screwdriver, wrench (connecting pump and pipes), shovel (digging holes or leveling ground), electric drill (if anchoring to hard surfaces), pipe wrench (tightening pipe joints), scissors (cutting pipes or wires);
Protective gear: Non-slip gloves (preventing cuts, especially when handling metal components of the corten round water table).
Prepare Key Materials
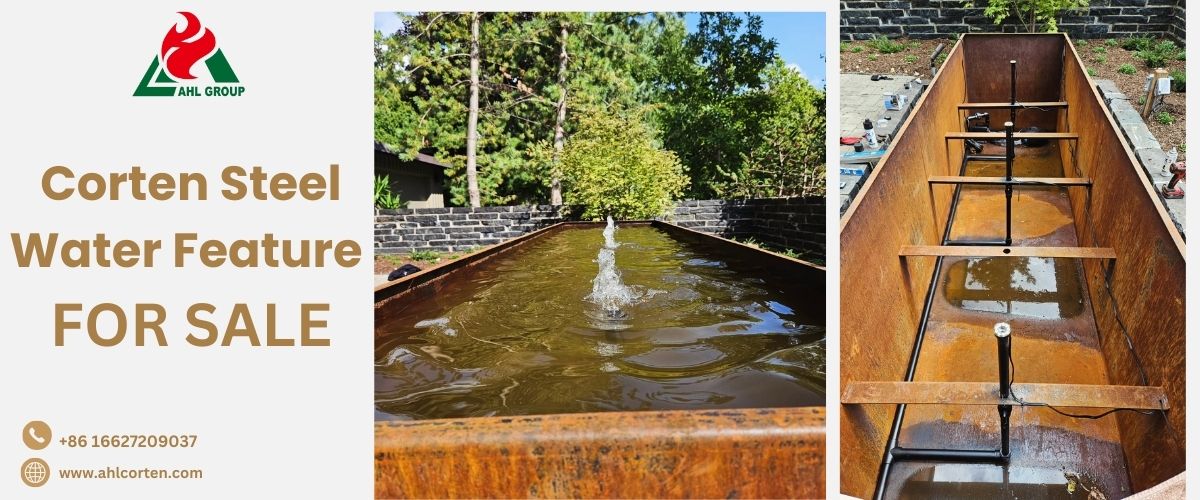
Core Components: Fountain basin (water reservoir), submersible pump (select appropriate power based on fountain size—10-100 watts for small, 200-500 watts for large), connecting pipes (compatible with pump fittings);
Foundation materials: Gravel / concrete slabs (for fountain base stability), bricks/paving stones (for edging and securing fountain position);
Supporting Materials: Decorative pebbles (scatter around reservoir to reduce splashing and enhance aesthetics), electrical conduit (use if wires are exposed to protect from rain damage), filter sponge (optional; place near pump to reduce clogging from debris).
Site Preparation: Creating a Stable Foundation for Metal Water Features
Corten water features require a foundation that is “level and solid.” Failure to meet these requirements may result in uneven water flow or tilting of the fountain.
Mark and Clear the Site
Use spray paint or wooden stakes to mark the installation area on the ground (10-20 cm larger than the reservoir to allow for edging).
Remove weeds, stones, fallen leaves, and other debris within the marked area. If grass is present, use a shovel to remove the top layer of turf, exposing level soil or hard ground.
Level the Ground and Prepare the Foundation
Use a shovel and rake to level the ground, then check with a spirit level to ensure no significant elevation differences.
If the ground is soft (e.g., soil), lay a 10-15 cm layer of crushed stone. Compact it before placing concrete slabs (or use a precast fountain base directly) to provide stable support for the rusted steel water feature;
Finally, line the outer perimeter of the marked area with bricks or pavers to secure the foundation and prevent surrounding soil from entering the basin.
Step-by-Step Installation: From Core Components to Final Commissioning
Positioning the Basin and Ensuring Levelness
Place the basin precisely at the foundation's center. Verify levelness using a spirit level from multiple angles. If any tilt is detected, adjust by placing thin stone slabs under the basin's base until perfectly level (this step is critical; otherwise, water flow will skew to one side, causing uneven water distribution).
Install the Water Pump and Piping
Place the submersible pump in a designated position within the basin (typically a corner to avoid obstructing water circulation). Ensure the pump's intake is not flush with the basin floor to prevent suctioning debris. Connect pipes according to the pump manual: attach one end to the pump outlet and run the other end to the reservoir edge, aligning with the fountain head connection (for multi-tiered or cascading corten round water table, connect multiple pipe sections per design); Gently tighten pipe connections with pipe wrenches to avoid over-tightening and component damage, ensuring no looseness (to prevent leaks).
Installing Fountain Heads and Connecting Electrical Circuits
Secure the fountain head at the designated location on thecorten water pond(e.g., top of metal bracket or edge of cascading basin), then connect the other end of the pipe to the fountain head. For electric pumps: Route the pump's power cord through the reservoir's reserved opening (or via a conduit) and connect it to an outdoor-rated outlet (ensure the outlet is waterproof to prevent electric shock). For solar pumps: Simply place the solar panel in a nearby, well-lit area and connect it to the pump.
Water Testing and Troubleshooting
Fill the reservoir until the water level submerges the pump (at least 5 cm above the pump to ensure proper suction). Turn on the pump switch and observe the water flow: If water flows evenly from the fountain head with no noticeable leaks, the installation is correct. If the flow is intermittent, it may indicate a clogged pipe or insufficient pump power (clean the pipe or replace it with a higher-powered pump). If connections leak, retighten them or seal them with waterproof tape.
Finishing Touches: Enhancing the Texture of Your Corten Water Feature
Adding Decorative Elements to Elevate the Ambiance
Lay a layer of decorative stones (such as pebbles) around the reservoir to cover exposed foundations and pipes. This reduces splashing while helping the corten water bowl blend more seamlessly with its natural surroundings.
For greenery enthusiasts, plant moisture-tolerant species (like calamus or ferns) beside border bricks, or grow succulents and herbs in planter water feature troughs to create a water-plant dialogue;
Nighttime effect: Install LED underwater lights or spotlights near the reservoir edge or fountain head. Light filtering through flowing water creates soft reflections, enhancing the atmospheric appeal of the metal water fountainafter dark.
Conceal Details, Ensure Safety
If power cables are exposed, encase them in conduit and bury them underground or secure them along the perimeter to prevent trampling or waterlogging. Inspect metal components of metal outdoor fountains: Smooth any sharp edges with sandpaper to prevent injuries to family members or pets.
Post-Installation: Maintenance and Safety Essentials
Routine Maintenance for Extended Lifespan
Clean the reservoir weekly: Use a net scoop to remove fallen leaves and debris. Change the water monthly (preventing turbidity and algae growth).
Inspect the pump every 2-3 months: Remove the pump and clean the intake filter screen with a soft brush. If algae is present, wipe it off with a mild saltwater solution and let it dry completely before reinstalling.
No need to deliberately remove rust from the metal components of the metal waterfall fountain: the naturally formed patina layer protects the steel. Simply wipe the surface with a damp cloth occasionally to remove dust.
Safety Precautions to Prevent Hazards
Electrical Safety: Turn off the pump during rain. If an operation is necessary, regularly inspect outlets and wiring for damage and replace them immediately if found.
Anti-Slip Measures: If gravel surrounds the reservoir, ensure it is compacted to prevent loosening and slipping after watering.
Winter Protection (Cold Regions): Before temperatures drop below 0°C, drain the reservoir, remove the pump, dry it thoroughly, and store it indoors to prevent ice expansion from cracking the reservoir or metal components.
DIY Too Challenging? Opt for Custom Corten Water Features
If DIY installation seems complex or you desire a more unique design, consider a professionally customized corten steel water trough:
Multiple styles are available, such as planter water features (combining water with greenery) or fire water features (suitable for poolside or outdoor leisure areas, offering warmth and visual impact).
Customization allows adjustments to size and details based on your garden's dimensions and style. Professional teams provide on-site installation services to ensure yoursteel water fountain is installed correctly and safely.
Conclusion: Savor Outdoor Serenity with a Metal Fountain
Installing a corten water feature is straightforward when following the “Plan - Prepare - Install - Maintain” steps, transforming your garden into a space with both aesthetic appeal and practicality. Whether waking to the soothing sound of flowing water in the morning or unwinding amidst light and shadow at dusk, a metal garden fountain becomes the focal point of your outdoor space, enriching daily life with natural beauty and tranquility.

.jpg)
.jpg)